
Choosing a Telescope for Viewing Nebulae
Few sights in astronomy are as captivating as a nebula: a vast cloud of gas and dust where stars are born, or the glowing remains of a star’s final days. With the right telescope, a dark sky, and realistic expectations, you can explore many of these distant objects from your own backyard or a nearby stargazing spot.
What Can You See Through a Telescope?
Nebulae come in several types, and each looks different through a telescope. Emission nebulae glow as nearby stars energize their gas. The Orion Nebula, for example, is bright enough to spot with binoculars under suitable conditions. Planetary nebulae are compact shells of gas shed by dying stars, while supernova remnants are expanding clouds left by stellar explosions.
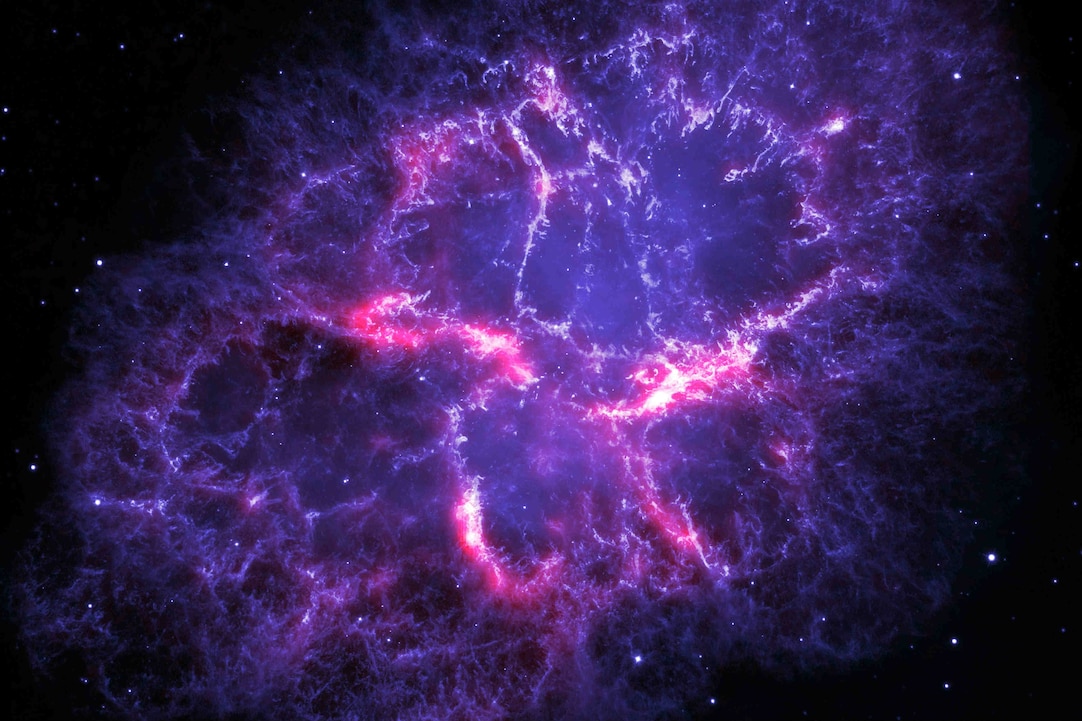
Most nebulae won’t look like the vivid, detailed images captured in long-exposure astrophotography. To the eye, many appear as faint gray patches, because human night vision is not very sensitive to color. Larger telescopes and darker skies can reveal more structure, but patience and careful observing make a big difference.
What to Look for in a Nebula Telescope
Aperture
A telescope’s aperture—the diameter of its main lens or mirror—is one of the most important factors for visual observing. A larger aperture gathers more light, helping faint nebulae stand out and revealing finer details. A practical telescope that is easy to set up and use regularly can be a better choice than a larger model that is difficult to transport or maintain.
Optical Design
Reflector telescopes, especially Dobsonian models, offer substantial aperture for the price and are popular for viewing deep-sky objects. Refractors can provide sharp, high-contrast views and are often simple to maintain, though larger apertures can be costly. Compound telescopes are compact and versatile, making them convenient for observers who need a portable setup.
Mount and Ease of Use
A stable mount makes it easier to keep an object in view. A Dobsonian mount is straightforward to operate manually, while an equatorial or computerized mount can help track objects across the sky. For beginners, ease of setup and intuitive controls are often more valuable than a long list of advanced features.
Helpful Accessories
A few well-chosen accessories can improve a nebula-observing session:
- Low- and medium-power eyepieces: These provide wider views that are useful for many large nebulae. A high-power eyepiece is not always helpful for faint, extended objects.
- Nebula filters: Narrowband UHC and O III filters can increase contrast for certain emission and planetary nebulae by blocking some unwanted light. Results depend on the target and observing conditions; these filters do not make every nebula brighter.
- Star charts or an astronomy app: These help you find targets and learn the constellations around them.
- A red flashlight: Red light helps preserve your dark-adapted vision while you read charts or adjust equipment.
Dark Skies Matter
Light pollution can wash out faint nebulae, even when using a capable telescope. If possible, observe from a darker location away from streetlights and bright buildings. Give your eyes about 20 to 30 minutes to adapt to darkness, and avoid looking at bright phone screens during that time.
Good transparency—the clarity of the sky—also matters. Haze, smoke, and thin clouds can reduce contrast. Moonlight can make faint objects harder to see, so plan sessions around the Moon’s phase when you can.
Tips for Observing Nebulae
- Start with an easy target. The Orion Nebula is a rewarding first choice when it is visible in the evening sky. Other popular targets include the Lagoon Nebula, the Ring Nebula, and the Dumbbell Nebula.
- Use low power first. A wider field of view makes it easier to locate an object and see its overall shape.
- Look slightly to the side. Averted vision—viewing an object just off-center—can help your eyes detect faint details.
- Observe patiently. Spend several minutes with a target. Subtle features often become easier to notice as your eyes adjust and your attention settles.
- Keep notes or sketches. Recording what you see helps develop observing skills and makes it easier to recognize details next time.
Is a Telescope Necessary?
Not always. Some bright nebulae can be seen with the unaided eye under dark skies, and binoculars are an excellent way to learn the sky and observe wide targets. A telescope offers greater reach and can reveal smaller or fainter objects, but it cannot overcome poor sky conditions. A modest telescope under dark skies may show more than a larger one under heavy light pollution.
Finding the Right Setup
The best telescope for viewing nebulae is one that suits your budget, observing location, and willingness to carry and set it up. Prioritize a stable mount, useful aperture, and a design you feel comfortable using. With regular practice, even familiar targets can reveal new details.
Whether you begin with binoculars or a telescope, nebula observing is a rewarding way to explore the night sky. Choose a clear, dark night, find a comfortable observing spot, and take time to let the view unfold.
9 Essential Tips for Viewing Nebulae Through a Telescope
- Choose a dark-sky viewing spot.
- Let your eyes adjust for 20–30 minutes.
- Use a low-power eyepiece to start.
- Allow the telescope to cool outdoors.
- Try a nebula filter to boost contrast.
- Use averted vision for faint details.
- Check weather and moonlight before observing.
- Use a star chart to locate nebulae.
- Keep expectations realistic—nebulae often look faint.
Choose a dark-sky viewing spot.
Choose a dark-sky viewing spot away from streetlights, buildings, and other sources of light pollution. Darker skies make faint nebulae easier to see and help reveal more of their shape and detail. If possible, observe on a clear, moonless night, and give your eyes about 20 to 30 minutes to adjust to the darkness before viewing.
Let your eyes adjust for 20–30 minutes.
Give your eyes 20–30 minutes to adjust to the dark before observing a nebula. Dark adaptation helps you see faint details that might otherwise be difficult to notice, so avoid bright lights and keep your phone screen dim or use a red flashlight during this time. If you accidentally look at a bright light, your eyes may need a little while to readjust.
Use a low-power eyepiece to start.
Start with a low-power eyepiece when observing a nebula. Its wider field of view makes it easier to locate the target and see more of its surrounding sky, which is especially helpful for large, faint objects. Once you’ve found the nebula and centered it, you can try a higher-power eyepiece to explore its details—though lower magnification often gives the clearest view of dim, extended nebulae.
Allow the telescope to cool outdoors.
Allow your telescope to cool outdoors before observing nebulae. A telescope brought from a warm room into cooler air needs time to reach the outdoor temperature; until it does, air currents inside the tube can soften and distort the view. Set it up in a safe, sheltered spot about 30–60 minutes before observing, depending on the telescope’s size and the temperature difference. This helps the optics settle and can make faint nebula details appear steadier and clearer.
Try a nebula filter to boost contrast.
Try a nebula filter to boost contrast when observing certain emission and planetary nebulae. Filters such as UHC or O III block some wavelengths of light, helping these faint objects stand out against the surrounding sky. The improvement depends on the nebula, your telescope, and sky conditions, and a filter won’t make every object brighter—so compare the view with and without it.
Use averted vision for faint details.
Use averted vision to make faint nebula details easier to see. Instead of looking directly at the object, shift your gaze slightly to one side while keeping it in view. The parts of your eye that are more sensitive to dim light are located away from the center of your vision, so this technique can help subtle shapes and wisps stand out. Give your eyes time to adjust to the darkness, and try looking from different angles to find what works best.
Check weather and moonlight before observing.
Before taking your nebula telescope outside, check the weather forecast and the Moon’s phase. Clouds, haze, and high humidity can reduce visibility, while bright moonlight can wash out faint nebulae. For the clearest views, choose a night with steady, transparent skies and little or no moonlight, and make sure your observing spot is safely accessible.
Use a star chart to locate nebulae.
Use a star chart to locate nebulae by first identifying the constellations and bright stars near your target. Charts show where a nebula sits in relation to recognizable landmarks, making it easier to guide your telescope to the right area of the sky. Choose a chart suited to your location and the current season, and use a red flashlight to read it without disrupting your night vision.
Keep expectations realistic—nebulae often look faint.
Keep expectations realistic when observing nebulae through a telescope. Many appear as faint, soft patches of gray rather than the bright, colorful clouds seen in astrophotography, because your eyes gather far less light than a camera during a long exposure. Dark skies, a suitable telescope, and patient observing can help reveal more detail, but even a subtle view can be a rewarding glimpse of a vast cloud of gas and dust far beyond Earth.